

MODULAR AI AND YOU – a work PIPELINE
An elaborate and customized AI system is a key feature for a multiplayer game that utilizes NPCs. The better the AI system is planned and executed, the better optimization of resources will be in the game. Furthermore, it affects the visuals and the experienced realism, as well as the entire gameplay experience.
This article is primarily concerned with the conceptualization and methods behind the creation of AI art assets for the modular system. It will detail the process of creating AI character models, taking time to explain every step.

ART
In the art department we had to restructure our process around two features that we wanted to incorporate into the AI: Modularity and Zombie Morphing – we will dive deeper into the latter in another article. The modularity system was devised by Jeremiah Costello and Alberto Flores, whereas the large majority of the development was handled by Daniel Schwarz. He is now going to shed some light on his creation process of the Modular AI from conceptualization to delivering the asset to the rigging/animation department. Furthermore, the NPCs of Cold Comfort must be able to transform (morph) into a zombie version of themselves at any point in time – another step in the pipeline that we’ll also explain in a separate article. But first, we will only focus on the uninfected version of the NPCs.
MODULARITY
The Modular AI in Cold Comfort plays a big role in maintaining realism and authenticity in a visceral environment. One key feature, and also aim, of the Modular AI system is being resource-efficient. The Modular AI System aims at delivering a certain level of randomness in the appearance of NPCs by combining interchangeable body/clothing parts and altering the texture (adding dirt, blood etc.) with the help of masks and nodes, and can be sustained with a smaller, and thus more resource-efficient library, rather than using a big library filled with different NPCs and texture sets. But in order to make the system work flawlessly there are important aspects in the creation process that need to be taken care of.
Basic Setup
We decided to split the NPCs into five interchangeable pieces. Every part will get its own texture set and has to meet a certain triangle count in order to keep every NPC at an average of around 30k tris. Additionally, each mesh, texture, and material follows a strict naming convention for organisational purposes and clear identification among different departments.

Conceptualization
The NPCs in Cold Comfort represent civilians in the immediate aftermath of a zombie apocalypse. Their clothing style is simple, only a few really adapted to the circumstances yet. So, for the first set of NPCs, we decided on normal and clean street clothes. Don’t worry, we’ll add grunge and blood later with the help of masks, once the NPC transforms into a zombie.
The clothes are designed this way to be interchangeable to a high degree. While currently all designs are aiming to be entirely interchangeable to create a high number of unique NPCs, not all planned clothing sets will be entirely interchangeable with all other clothing items.
Since the clothing parts must be interchangeable, we can’t choose any uniforms or sets that only work together. We also can’t pick clothes that are too unique and stick out too much. Below is a video of the clothes for the first set of modular pieces.
Modeling
In order to make the interchangeability work, areas where the different modular pieces meet have to be identical among all clothing sets. They need to be at the same locations in 3D space and shouldn’t crash into each other. Once a universal scale for all parts is set, the next steps of the modeling process are almost identical with most peoples’ workflows for 3D characters: Block out in Marvelous Designer (for clothes) – High-Poly in ZBrush – Retopology in Maya (or 3Ds Max). Now, regarding the retopology, in our case, there are certain things that need additional attention.
1.
The topology of the deforming body parts (neck/chest area and arms), which is normally covered by clothes can’t be changed, because it’s acting as a guide for the topology of all clothing parts above to avoid crashing geometry.
The same rule also applies to layers of clothing in one modular piece, like a shirt below a jacket for instance.
The topology of the head above the neck can be changed. But the circumference of the skull on the other hand not, because it has to fit with all top pieces in our library.


2.
We cut the lowpoly geo of the arms into upper arms, lower arms and hands. Depending on how much the sleeves of the overlying cloth will cover the body, parts of the arms will be hidden in engine in order to, for example, avoid crashing geometry.
Transferring vertex normals from the smoothed, combined arms to the cut ones will hide ugly seams along the cuts. Now, we don’t have to bother with the clothes’ topology if the sleeves reach over those cuts, since we will also conveniently place them right after the deforming areas of the arms.
UVs & Texturing
Regarding the UVs and texturing, our process does not require any specialized work. UVs and Texturing will, however, play a big role in the NPC transformation to a zombie article. For now, it’s only important to follow the common steps that are crucial for a good UV Layout in order to texture properly. Since we are going to be creating a lot of heads, due to the previously explained setup, it’s a good idea to keep recurring meshes like the eyes, or the mouth on the same locations in UV space in order to reuse their textures for other head variants.
Colour Variations (Masks)
These masks will be later used to change the colours of certain areas of the clothes (or even arms for different ethnicities). For this torso piece it was decided to make the colours for 3 areas interchangeable: Jacket, pullover and shirt.

Since we chose the hue shifting node in UE to change the colors, it’s important to deliver the textures colored (and don’t include any white or black clothes). It’s also important to exclude anything from the mask, that shouldn’t be hue shifted like dirt, or edge wear and keep these areas black or grey in the mask to lower the impact of nodes on them. And that’s it for the uninfected version of our set of modular pieces. Now, we can deface our handsome looking dude, transform him into a zombie and match his clothes to his new lifestyle.
WRAP-UP
We hope you enjoyed our brief break-down of the Modular AI asset process. Stay tuned for more posts on the subject, where we discuss the morphing process in detail; and make sure to check out Daniel’s ArtStation page and give him some love!
OTHER NEWS
 https://www.coldcomfortgame.com/wp-content/uploads/2021/01/CC_BestOfClipsVolume01.jpg
1040
1920
GMAdmin
https://www.coldcomfortgame.com/wp-content/uploads/2018/06/ColdComfort_HeaderLogo-300x108Inverted-300x108.png
GMAdmin2021-01-02 10:49:542021-01-02 10:49:54Pre-Alpha Clips
https://www.coldcomfortgame.com/wp-content/uploads/2021/01/CC_BestOfClipsVolume01.jpg
1040
1920
GMAdmin
https://www.coldcomfortgame.com/wp-content/uploads/2018/06/ColdComfort_HeaderLogo-300x108Inverted-300x108.png
GMAdmin2021-01-02 10:49:542021-01-02 10:49:54Pre-Alpha Clips https://www.coldcomfortgame.com/wp-content/uploads/2020/12/CC_PatchNotes_v0.0.4_thumbnail.jpg
900
1600
GMAdmin
https://www.coldcomfortgame.com/wp-content/uploads/2018/06/ColdComfort_HeaderLogo-300x108Inverted-300x108.png
GMAdmin2020-12-22 12:48:372020-12-22 21:09:37Patch-Notes-0.0.4
https://www.coldcomfortgame.com/wp-content/uploads/2020/12/CC_PatchNotes_v0.0.4_thumbnail.jpg
900
1600
GMAdmin
https://www.coldcomfortgame.com/wp-content/uploads/2018/06/ColdComfort_HeaderLogo-300x108Inverted-300x108.png
GMAdmin2020-12-22 12:48:372020-12-22 21:09:37Patch-Notes-0.0.4 https://www.coldcomfortgame.com/wp-content/uploads/2020/10/CC_2020_Oct27Stream_v02.png
700
700
GMAdmin
https://www.coldcomfortgame.com/wp-content/uploads/2018/06/ColdComfort_HeaderLogo-300x108Inverted-300x108.png
GMAdmin2020-10-28 12:13:392020-10-28 13:02:322v2 PROTOTYPE GAMEPLAY 2020.10.27
https://www.coldcomfortgame.com/wp-content/uploads/2020/10/CC_2020_Oct27Stream_v02.png
700
700
GMAdmin
https://www.coldcomfortgame.com/wp-content/uploads/2018/06/ColdComfort_HeaderLogo-300x108Inverted-300x108.png
GMAdmin2020-10-28 12:13:392020-10-28 13:02:322v2 PROTOTYPE GAMEPLAY 2020.10.27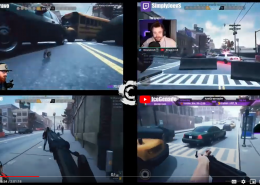 https://www.coldcomfortgame.com/wp-content/uploads/2020/10/Capture.png
713
1266
GMAdmin
https://www.coldcomfortgame.com/wp-content/uploads/2018/06/ColdComfort_HeaderLogo-300x108Inverted-300x108.png
GMAdmin2020-10-27 10:38:582020-10-28 11:58:352v2 PROTOTYPE GAMEPLAY 2020.10.13
https://www.coldcomfortgame.com/wp-content/uploads/2020/10/Capture.png
713
1266
GMAdmin
https://www.coldcomfortgame.com/wp-content/uploads/2018/06/ColdComfort_HeaderLogo-300x108Inverted-300x108.png
GMAdmin2020-10-27 10:38:582020-10-28 11:58:352v2 PROTOTYPE GAMEPLAY 2020.10.13
